


|
Restore Lost Pictures from XD Cards
Did you lose photos from your XD card? Digital photo recovery software makes restoration of lost or deleted photos from XD memory card on Windows
Digital Photo Recovery is highly rated software that restores lost pictures of various popular formats along with music, video and other files
Evaluate the software. Download the Free Demo Now!
Digital Photo Recovery
Scan
Select
Recover

XD picture card is popularly known as XD cards. These flash cards are commonly used to store pictures and other files. These are mainly used in Digital Cameras, DSLRs and other image capturing devices. Some of the digital cameras that use XD cards are Olympus and Fujifilm. XD stands for Extreme Digital, are available in a range of capacities varying from few Megabytes (MB) to several Gigabytes (GB).
These portable XD cards have high importance as they may contain memorable pictures of much treasured moments. The photo files stored are vulnerable due to the following reasons:
- Corruption in the flash file system of the XD picture card. Know more about recovery from corrupted memory stick.
- When you plug in the XD card to the system and get a pop up message "Would you like to format now", which may result in involuntarily formatting the card and loss of all the picture files
- Sometimes improper handling of the card like pulling the card out without switching off the camera
- Clicking the pictures while the battery signs low
- If images are clicked rapidly and camera cannot complete writing image in the card, it may result in image loss
Digital Photo Recovery Software is capable software with user friendly interface that easily restore photos from XD cards. This makes restoration process easy and convenient for a user with little or minimum computer knowledge. This photo restoration software is loaded with enhanced options. The software also has the capability to restore RAW pictures from Smart Media cards of various popular brands.
You are just few clicks away from restoring your precious pictures; follow the simple steps to get back lost pictures from your XD memory card on Windows OS. Visit this link for Mac version.
Step 1: Install Digital Photo Recovery Software on a healthy computer / laptop and connect the XD memory card to it with a USB cable or the card slot in the laptop. Launch the application by double clicking the shortcut on the desktop or selecting it from the Program Menu. As the main window appears click on the "Recover Photos" option to continue as shown in Figure 1
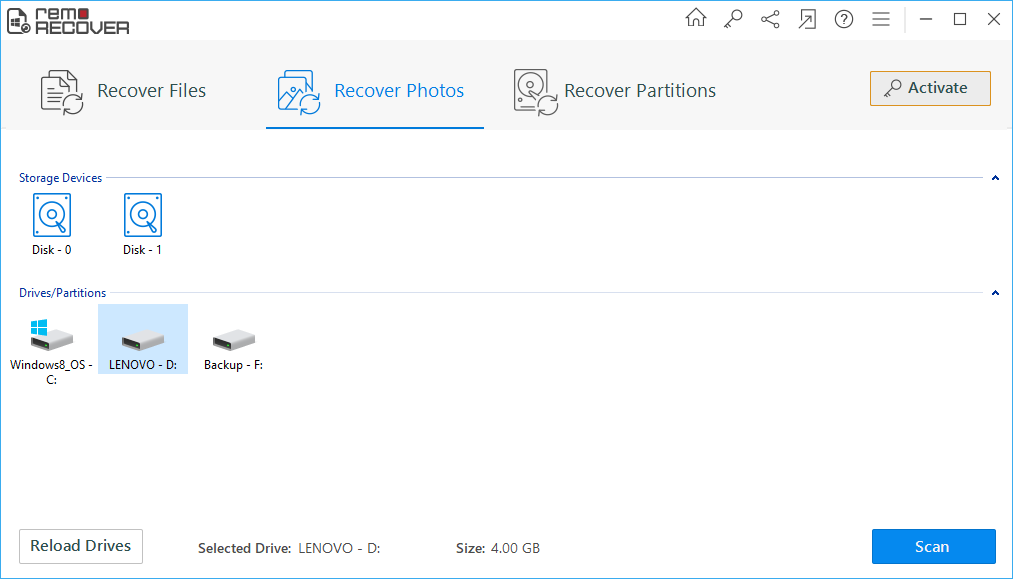
Figure 1: Main window
Step 2: : On the next window you will find "Recover Deleted Photos" and "Recover Lost Photos". Select "Recover Lost Photos" which allows you to select the drive / partition as displayed in Figure 2
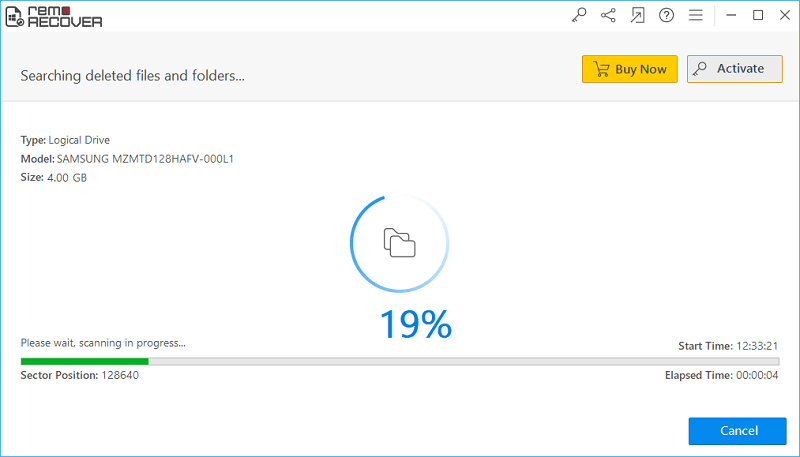
Figure 2: Recover Lost Photos
Step 3: After selecting the option, the XD card recovery software will lead you to a window lists out the connected physical and logical drives as shown in Figure 3. If the required drive / partition is not visible in the list, click on "Reload Drives" option. Select the drive / partition on which restoration needs to be performed and click on "Next" to continue
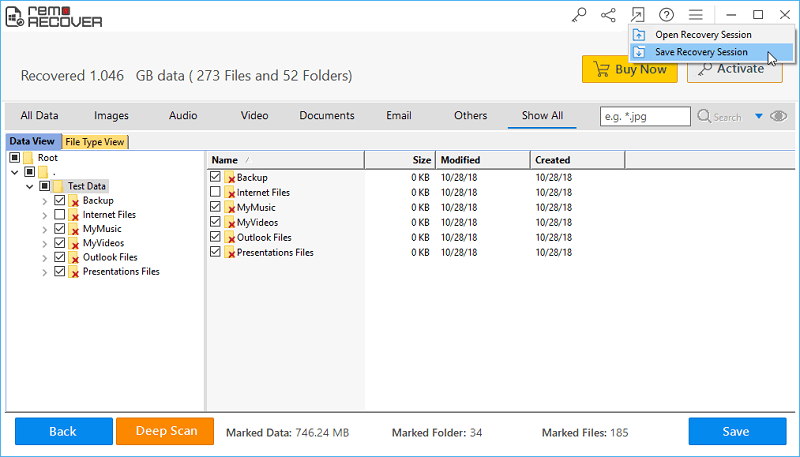
Figure 3: Select Drive / Partition
Step 4: The unique signature search can also be performed by selecting the listed file types as shown in Figure 4 displayed below. This scanning process can also be skipped by clicking the "Skip" option.
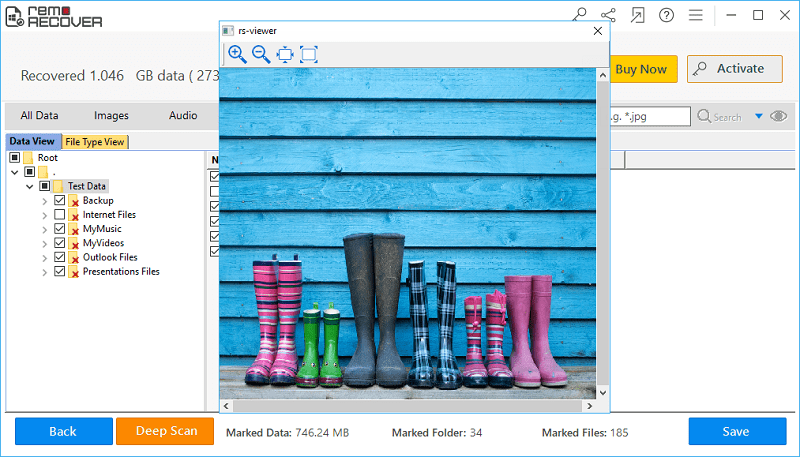
Figure 4: Select file type
Step 5: The application starts the scanning process on the selected drive/partition once you click "Next" or the "Skip" button. The percentage of scanning process along with the Start time, Elapsed time is displayed while scanning as shown in Figure 5
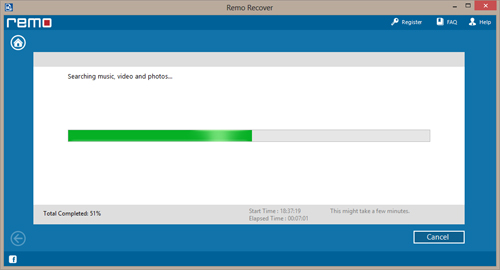
Figure 5: Scanning process
Step 6: As the scanning completes the recovered pictures are displayed. The "Data View" or the "File Type View" option allows you to view the restored photos as shown in Figure 6
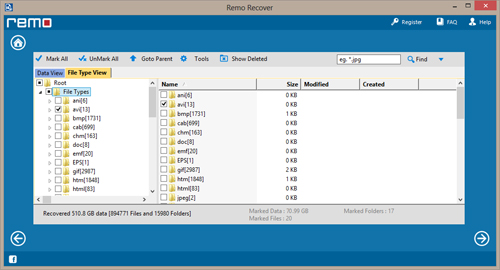
Figure 6: Data View / File Type View
Step 7: The software allows you to preview the recovered photos using "Preview" option as shown in Figure 7
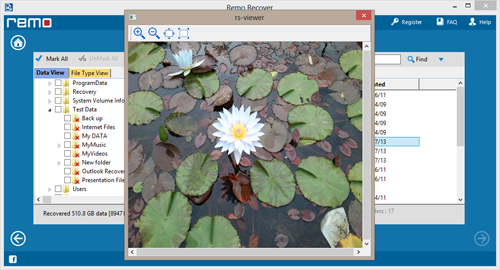
Figure 7: Preview
Step 8: The "Save Recovery Session" option in the "Tools" menu bar, lets you save the scan session which has can be loaded using the "Open Recovery Session" option so that rescanning the entire drive / partition can be avoided which saves time. As shown in Figure 8
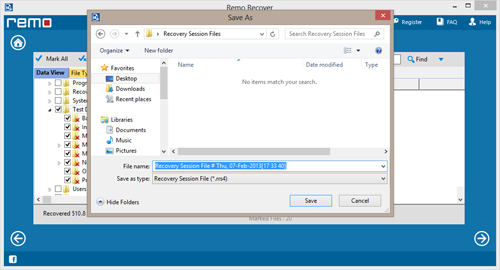
Figure 8: Save / Open Recovery Session

![]()
