


|
Recover RAW Images from Smart Media Cards
Did you lose the valuable photos of your loved ones fom your digital camera?
Digital Photo Recovery software lets you recover deleted and lost photos from all types of digital cameras
Digital Photo Recovery software is a powerful photo recovery application that recovers deleted/lost photos on Mac and Windows OS
Try Digital Photo Recovery software Now
Digital Photo Recovery
Scan
Select
Recover

Some of the digital cameras allow you to click snaps in both JPEG as well as RAW image file format. Raw image files are unprocessed or minimally processed files. Digital cameras, image scanners and motion picture film scanners uses RAW image file format to store files. However, some of the common RAW image file formats include .bay (Casio), .cr2, .crw (Canon), .dcs, .dcr, .kdc (Kodak), .mef (Mamiya), .mrw (Minolta), .pef (Pentax), .raf (Fuji) and .raw, .rw2 (Panasonic). There are different kinds of memory cards such as Compact Flash (CF), Smart Media Card, Secure Digital cards(SD), XD cards, Multimedia Cards(MMC), Mini SD cards and Micro SD cards that are commonly used to store pictures in digital cameras. To restore NEF file format of Nikon camera, particularly, visit https://www.digitalphotorecovery.org/nef-file-format-of-nikon.html
When you click a snap in JPEG file format, the images are processed using the in camera’s parameter and you get a ready to print image. Whereas, if you click a snap using RAW image file format, the images need to be further edited in a computer before you can view or print them. This feature, though time consuming, especially when you have more number of photos, lets you change many of the parameters like contrast, sharpness, white balance, saturation etc., of a image, using a RAW convertor. The RAW file often known to as the digital negative, can be converted to JPEG or TIFF, which enable you to store, print or further manage the image. RAW files have widespread application in professional photography. Most of the professional digital cameras use Smart Media or Miniature cards for storing files. RAW files can be edited only if you transfer it to your Personal Computer or laptop.
Data loss can occur due to following scenarios mentioned below:
- The cable is pulled off while transferring files from the camera to your PC or laptop.
- Accidentally deleted files from the Smart Media card.
- Unintentionally formatted the card.
- Improper shutdown of the system due to power fluctuations or application malfunction.
- Backup is corrupt or incorrect backup practices.
- Virus attack is also the most common reason for corrupting files stored in smart media card.
Even after losing image files from the Smart media card, you can still recover it using specialized digital photo recovery software. When files are deleted or lost from the Smart media card, they do not get erased completely, but the pointers pointing to those file locations are erased hence, makes the data inaccessible. The specialized photo recovery tool is enabled with powerful algorithms to trace and restore such image files effectively.
However, if you use the same camera to click more pictures after data loss, then the chances of recovering deleted or lost files decreases severely, because the new pictures will overwrite the lost or deleted files. So, immediately after you lose files from a Smart Media card remove the card from the your digital camera and store it in a safe place to avoid using it further, till you recover lost files.
Digital picture files recovery application is the most reliable file recovery tool available in the market that can easily perform RAW image file recovery. Click here to read more. This software has some magnificent features that helps to retrieve lost pictures from digital cameras. It can recover all your entire lost, erased and corrupted image files from any critical data loss scenarios. This effective application enables you to recover files by scanning the entire drive in very few minutes. It is an effective recovery tool, which helps you to restore lost or deleted files from different types of memory cards like SD, CF, MMC,Smart Media and XD memory cards and capable of recovering and restoring digital RAW images from all popular brands of digital cameras like Olympus, Fujifilm, Nikon, Sony, Canon etc. The software recovers more than 280 file types and also facilitates recovery of files from FAT16, FAT32, NTFS, NTFS5, Ext FAT drive. You can download the free demo version of this application and check for the recovery results.
Note: You can use the Mac version of the software to undelete digital images on Mac OS X.
Follow the steps given below to recover RAW images from Smart Media Card:
Step 1: Remove the Smart Media card from your digital camera, and connect it to a healthy PC where the software has already been installed. Start the application by double clicking the desktop shortcut or by selecting it from the Programs list in the Start Menu. The main window is displayed as shown in Figure 1. Select the "Recover Photos" option as shown in Figure 1.
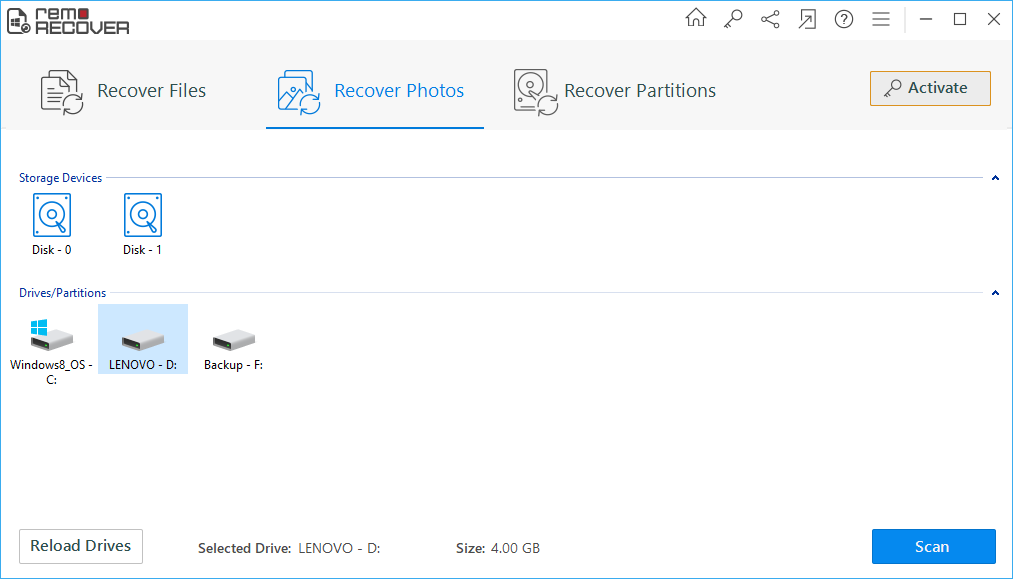
Figure 1. Main Window
Step 2: Once you select this option, a new window displays two options namely "Recover Deleted Photos" and "Recover Lost Photos". Select "Recover Lost Photos" option to manually select the drive / partition from which the photos have been lost and proceed with photo recovery as shown in Figure 2
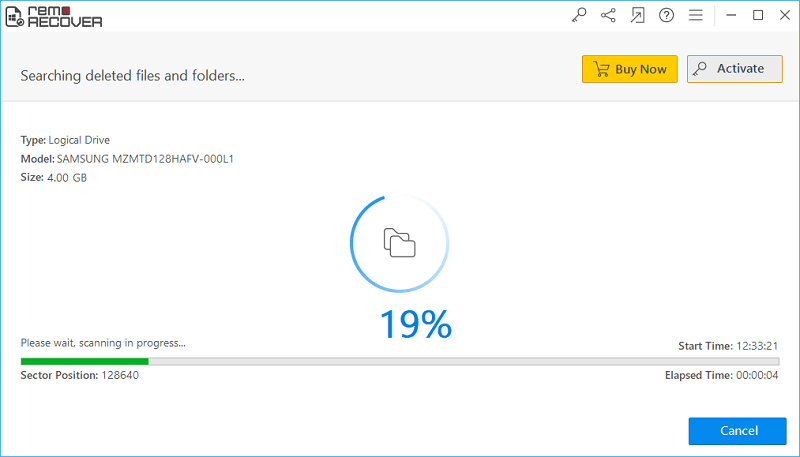
Figure 2. Select Recover Lost Photos option
Step 3: Once you select this option, a new window displays the connected physical and logical drives as shown in Figure 3. Select the drive / partition from which you want to recover lost digital camera photos and click on "Next"
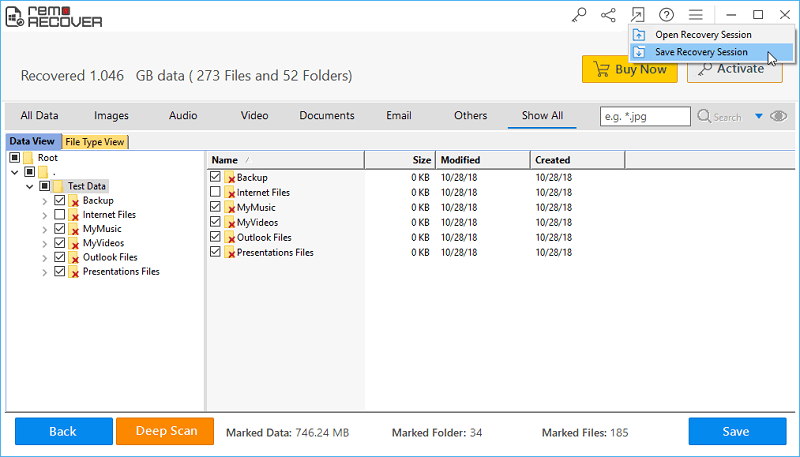
Figure 3. Select Logical Drive
Step 4: You can perform an additional search for photos based on their unique signature by selecting the listed file types as shown in Figure 4. You can also select the "Skip" option to skip this step and proceed with the scanning process
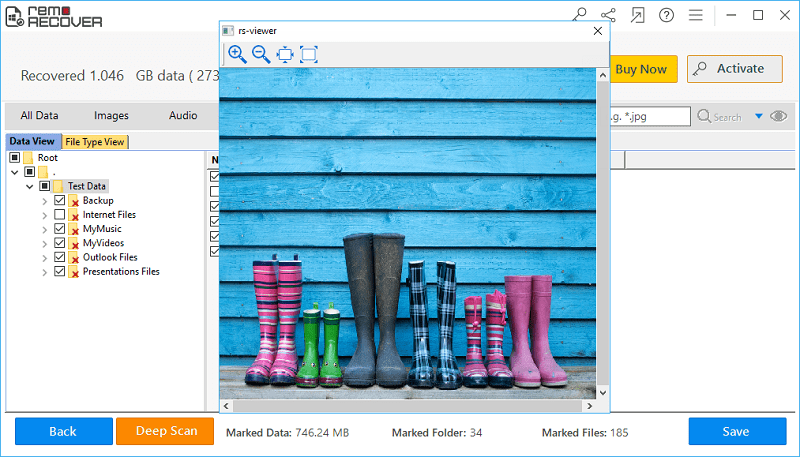
Figure 4. Select File Type
Step 5: Once you click the "Next" or the "Skip" button, the software starts scanning the selected drive / partition as shown in Figure 5. While scanning the software displays the Start time, Elapsed time and the percentage of scanning that has been completed.
Figure 5. Scanning Process
Step 6: Once the scanning process is finished, the recovered photos are displayed. The recovered photos can be viewed using the Data View or the File Type View option as shown in Figure 6.
Figure 6. View Recovered Photos
Step 7: To preview the recovered photos, you can make use of the "Preview" option. The "Save Recovery Session" option lets you save the scanned information. This information can later be loaded using the "Open Recovery Session" option so that rescanning the entire drive / partition can be avoided
Figure 7. Preview Photos

![]()
