Guide to Retrieve Deleted or Lost Images from Memory Card
Did you delete precious pictures from of your memory card?
Picture recovery is best photo recovery tool that helps you recover all your
deleted / lost pictures, office files, and music and video files from memory
card
Download and Try Picture Recovery software now

Pictures are the most memorable for any individual as he / she captures the most memorable moments of their life in the form of pictures. Usually the pictures are stored on the hard drive, memory stick, SD card, SDHC card, USB drive, flash memory cards and other external storage devices.
You may accidentally delete pictures from all these flash storage devices while previewing them. Accidental deletion of pictures, audio and video files may occur when you press Shift + Delete keys, after pressing the "Delete All" option on your camera or when you empty the Recycle Bin or Trash by mistake. Even deleting right from the memory card that is connected to the computer / laptop also ends up in photo loss, as they bypass the Recycle Bin or Trash.
You can use this software to recover deleted pictures from memory card in an efficient and easy-to-use picture recovery software that lets you recover deleted / lost digital pictures, songs and video files from memory card effectively. To enhance the recovery chances, avoid saving any new photos, songs and videos on to it, after deleting your photos from them. The software also lets you restore digital lost pictures from Sandisk and other popular brands of memory cards. The software supports CF card photo restoration and also SD card recovery. Know more about this topic on this link:https://www.digitalphotorecovery.org/cf-card-photo-recovery.html
Follow the steps given below, to recover deleted pictures from memory card:
Step 1: Connect the memory card via a USB cable to a healthy laptop / PC on which the Digital Photo Recovery Software has already been installed. Launch the application by selecting it from the Programs Menu or by double clicking the desktop shortcut. The main window appears; select the "Recover Photos" option as shown in Figure 1. Visit on this link to know how to use this software on Mac system: https://www.digitalphotorecovery.org/on-mac.html
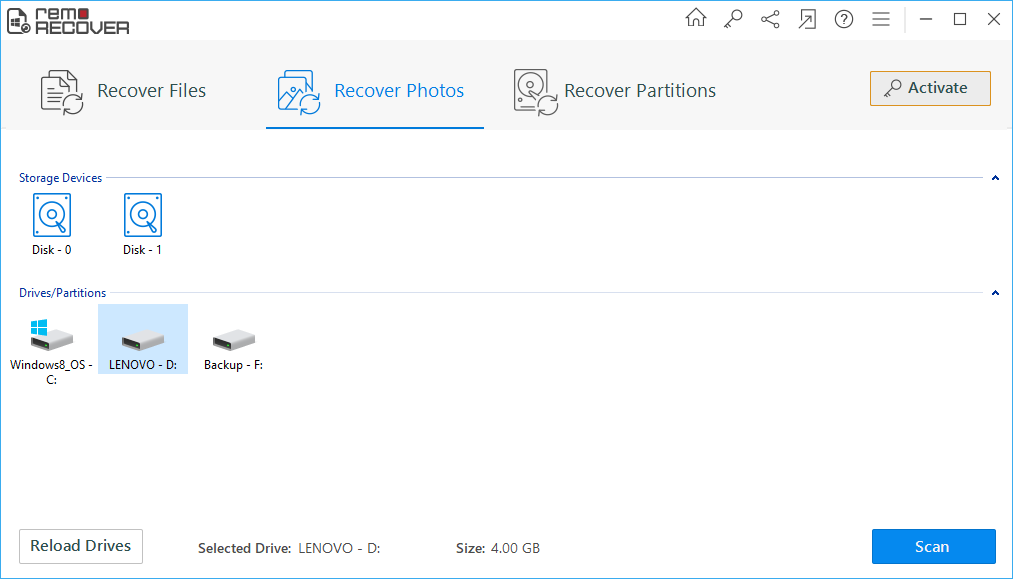
Figure 1. Main Window
Step 2: Select the memory card which is displayed as a logical drive to recover deleted pictures from memory card as shown in Figure 2
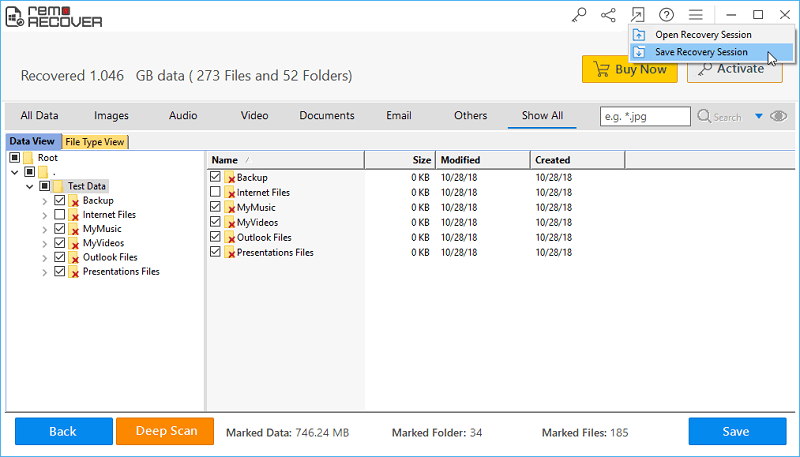
Figure 2. Select Logical Drive (Memory card)
Step 3: The software lets you select the image file types that are listed, based on their unique signatures or you can either use "Skip" option to skip this step and proceed with the scanning process as shown in Figure 3
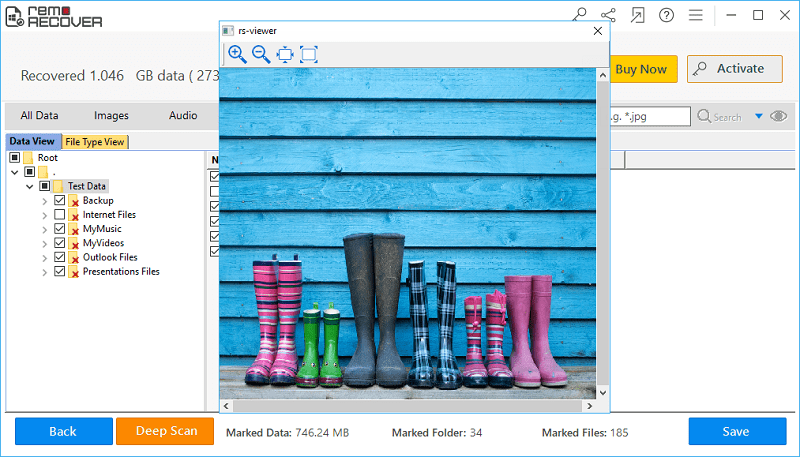
Figure 3. Select Picture File Type
Step 4: The digital picture recovery tool scans the selected memory card to find the lost pictures as shown in Figure 4
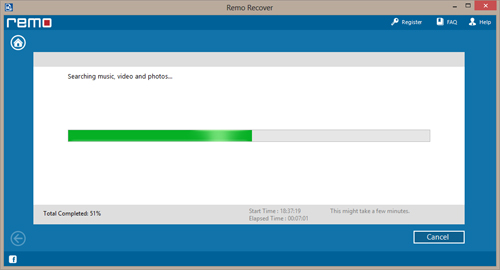
Figure 4. Scanning Process
Step 5: Once the scanning process is finished, the recovered photos are displayed can be viewed in either "Data View" or the "File Type View" option to view the retrieved pictures as shown in Figure 5
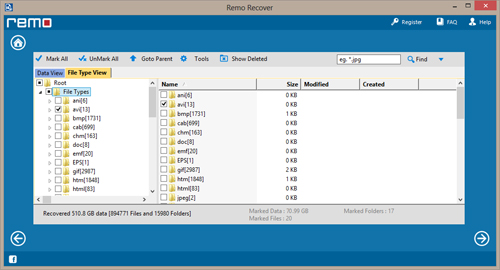
Figure 5. View Recovered Pictures
Step 6: The "Preview" option helps you to preview the recovered photos which helps you to evaluate the capability of the software as shown in Figure 6
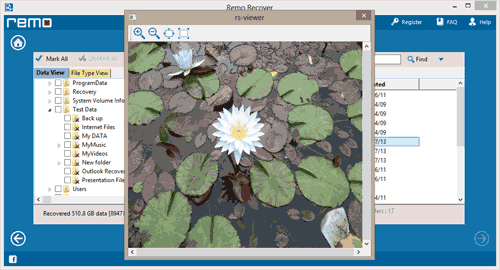
Figure 6. Preview Pictures