


|
Recover MMC Card Photos
Accidentally deleted your valuable photos?
You need not worry now, you can get back the deleted or even lost photos from MMC card.
Download the Demo Version Now to know how easy it is to get all the deleted/lost photos.
Digital Photo Recovery
Scan
Select
Recover

MMC (MultiMedia) card is a flash memory card and is small; it can be used in most devices that support SD cards and are storage medium for a portable device. These multimedia cards are used in almost every context in which memory cards are used, like cellular phones, digital audio players, digital cameras, they can be directly connected to the computers or laptops. Most of the systems and laptops provide card slots where you can insert the MMC and insert it directly to copy photos or other media files from the card to the system or vice versa. MMCs are available in sizes up to and including 128 GB. Since the introduction of SD card, few companies build MMC slots into devices, pin compatible MMCs can be used in almost any device that supports SD cards if the software on the device supports them. You might have stored vacation photos, videos or your favorite music on the MMC, due to improper handling of the MMC or due to various other reasons the card might be inaccessible. If you have lost pictures or deleted them accidentally from MMC card, it can be recovered from deleted photos from MMC card recovery tool. This advanced digital image retrieval utility enables you to restore digital camera files effortlessly. Know how.
Things to remember when the data is lost from the MMC:
Do not take any new photos, videos or store any music files on the MMC card, remove the card and do not use it again until you recover all the data from it. You will be able to retrieve the files from memory card unless you format the card or save any new photos to it. Most cameras do not overwrite the memory on cards when a simple delete command is used. Instead, they just mark the space that the images had been stored on it, which is being free for use. So, if no other format or write commands are used on that space, you can retrieve RAW pictures from mmc card.
Reasons for loss of pictures:
- Accidentally deleted pictures from the mmc card or some other user might have deleted it.
- By formatting the mmc card, the data stored in it will be lost
- Damage or corruption of the mmc card
- Due to virus attack files may be deleted or inaccessible
- Corruption of mmc card leads to inaccessibility of the data in it
- Due to fluctuation in the power images may be lost
- Abruptly pulling out the mmc card causes loss of data
- Using the same mmc card in various other devices
You can easily retrieve deleted pictures from MMC Card by using image recovery from MMC card, which is also available in a demo version. You can download, install, and run the software to retrieve the data that are accidentally deleted or lost, but you will not be able to save the retrieved files in this trial version. You can preview these files and save the scanned information. When you are satisfied with the result, you can purchase the complete version and recover all the files that you want and you can use the saved scanned information to avoid re-scanning. Photo recovery from Kodak cameras can also be done if you have lost photos or accidentally deleted them. Visit here to know more.
Step 1: Download and install the demo version. Run the software and then select "RECOVER PHOTOS" option from the main screen.
Main Screen
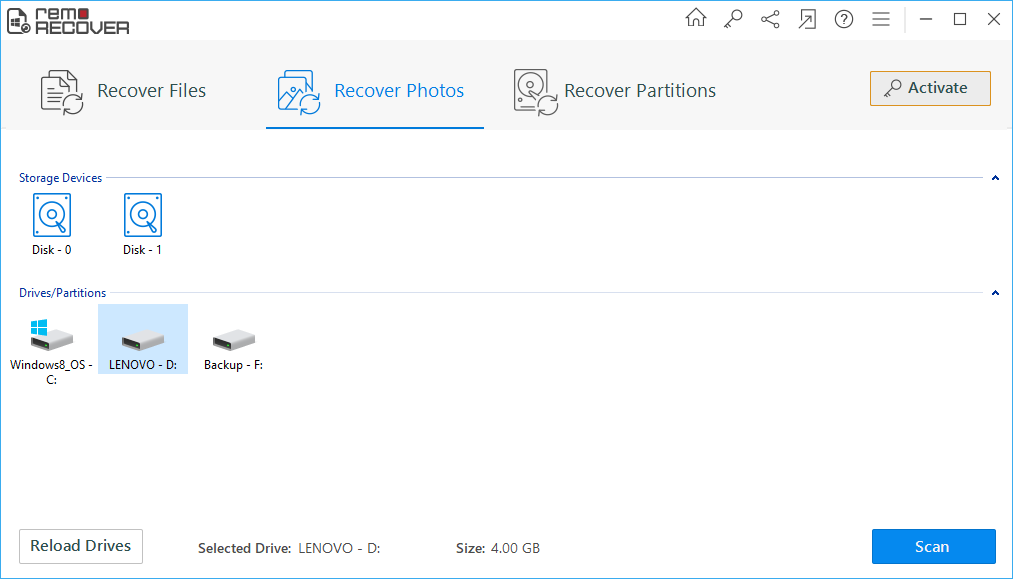
Step 2: To restore deleted pictures, select "RECOVER DELETED PHOTOS" otherwise select "RECOVER LOST PHOTOS". Then after select the drive from which you want to retrive deleted photos and click "Next".
Select Drive
Step 3: Select the file type whether you want to recover photos, videos or audio. You have an option to type the file type which you are looking for on top-right of the screen. Or you can scan for all the files which are deleted.
Select File Type
Step 4: Scanning process starts searching for the photos.
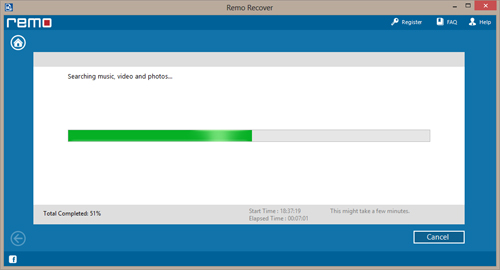
Scanning Process
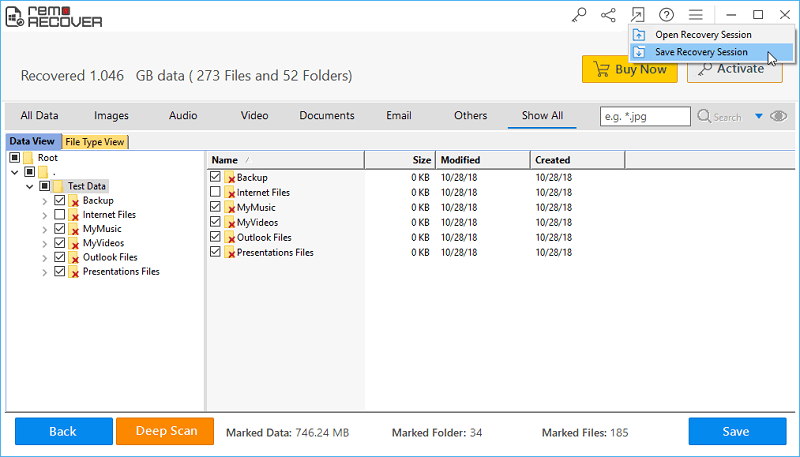
Step 5: You will get a list of Recovered photos, you can also search for videos or audios. You can view this in either "Data type/File type view". This option is seen on the top-left.
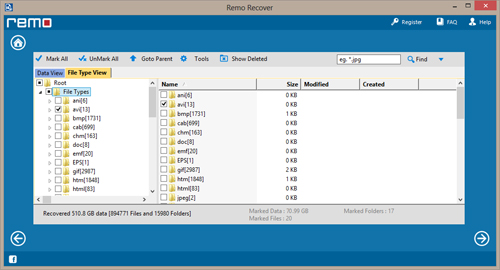
View Recovered Photos
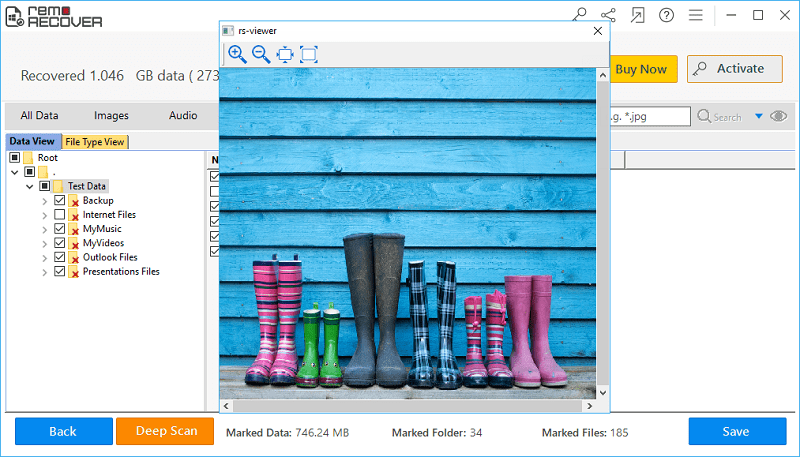
Step 6: The "Preview" option helps you to preview the recovered photos.
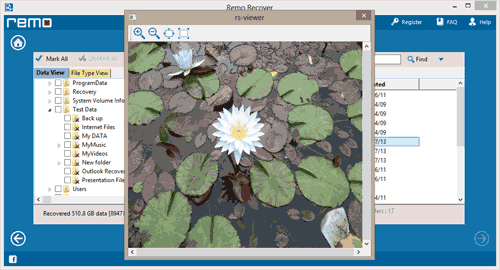
Preview Photos

![]()
